The more common glues I’ve found that dollhouse builders use include white tacky glue, yellow wood working / carpenter’s glue, hot glue gun glue, Liquid Nails (non-water soluble) and wallpaper paste.
Yellow Woodworking Glue:
Going back many years, I was always told that yellow woodworking glue was much better than any white glue when joining wood to wood. After building my first dollhouse with yellow glue for all of the structural joints (and mostly white tacky glue for non-structural joints) I was told by a ‘pro’ builder that white tacky glue is better for most of the dollhouse construction because the yellow woodworking glue joints can come apart after ‘enough time’ has passed. While I’m not expecting to see any failed yellow glue joints in the first dollhouse I built (in the rest of my lifetime), I am expecting the dollhouses I build to be around and in service long after I’m gone. With that in mind, I’ve taken this pro’ builder’s statement as true words of experience and have since switched to using white tacky glue in place of yellow glue throughout the dollhouse building process.
White Tacky Glue:
One very clear advantage of white tacky glue (over yellow glue) is that it dries clear so any small amounts of excess that you might fail to wipe completely clean won’t force you to have to go back and do paint touch up to cover the small amount of excess glue. This can quickly become a much bigger deal if the joint is between something like detailed trim (of one color) against the house or trim of another color. I’m not suggesting you cannot do a quality paint touch up job in cases such as this but I will say that it will take extra time that you need not spend by using clear drying glue instead of yellow glue.
As for application, bare wood to bare wood will glue up stronger than if one or both the contact surfaces have already been painted. The higher the painted gloss level, the weaker the glued surfaces will have. That said, I find that it is typically OK to not worry too much about gluing painted surfaces if it is a non-structural decorative piece, like gluing a shutter to the house. If we are talking about something more structural, like foundation, floors, walls, roof, posts and rails, then I would recommend bare wood to bare wood where possible. If a surface already has some sort of finish coat on it, like a pre-finished floor, then doing a little rough up with sand paper(like where an inside room wall is to be installed) is a good idea. I like to use enough glue such that some excess always squeezes out when the parts are pressed together. If the excess glue will be seen or will cause a fit problem for some other part yet to be installed, the excess glue pressed out from the joint should be wiped clean. I like to use a pretty damp rag to wipe off the excess glue. Old cotton tee-shirts make great rags for this sort of thing as they tend not to leave extra rag fibers behind as might a bath towel or face cloth type rag. The rag can be rinsed often with warm water, rung out, and re-used right away. For wiping inside corners, using some sort of object such as a dull pencil, flat head screwdriver, or edge of a putty knife , to push the rag close into a corner or along an inside corner joint works well.
Hot Glue Guns:
For most of the build, hot glue is not the glue of choice. I suggest that you not use hot glue for anything that requires real structural strength. There area some applications though where hot glue can work out well. If you do use hot glue, keep in mind that it does not allow much time to join pieces together, will not have a lot of holding power if the glue is spread thin, and can prevent a tight fit of the pieces if the glue is spread thicker.
Hot glue can be a good choice for places where the object might need to later be removed. When installing a built staircase for example, using hot glue to hold it in place can work well. The hot glue can provide enough holding power to keep the staircase in position but not so much holding power that the staircase can’t later be removed without causing substantial damage. Glue where the staircase meets the upper and bottom floors (not along wallpapered walls). If the staircase needs to be removed at a later time, old glue can be removed with a razor before installing again. Other places where hot glue might be a good choice include added decorative pieces such as a mailbox, house numbers, and garden hose being added to the exterior of the house or pictures, wall clocks, and sometimes ceiling light fixtures in the interior. And while I’m still in search of a better way, I use hot glue to install oriental stair runners (covered in a separate post).
Liquid Nails (non-water soluble):
This is the adhesive of choice for installing roofing shingles. For additional tips on gluing roof shingles, see separate post on roofing.
Wallpaper Paste:
Yes, there is such a thing as dollhouse wallpaper and dollhouse wallpaper paste. While I’ve come across a few different brands, they have all been either a real thick paste or a thinner paste more like real house wallpaper paste. The application is different for each of these. For the real thick stuff, a very thin coat, applied with a spreader like the edge of a credit card works well. I’ve been told that it is better to apply this type of paste to the paper (instead of the wall). This might assume that the walls are still bare wood (and have not been primed). When using the thick stuff, is important to get a fairly even spread of paste as squeezing out lumps, ridges, or excess after the paper is up requires some extra force to smooth out the thicker paste. The thinner pastes can be applied with a brush and can be worked like your hanging real house wallpaper. If you have already mastered hanging wallpaper for real, pretty much everything you already know is still applicable for dollhouses. One thing to keep in mind though is that dollhouse wallpaper will typically be much more sensitive to being wet (from the paste) and therefore stretch and tear pretty easy. I find it quicker and easier to apply most of the required wallpaper paste to already primed walls (instead of the wallpaper). For more tips on wallpapering see separate ‘wallpapering’ post.
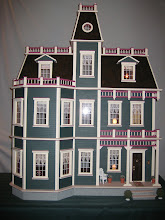
Wish I built this one 20 years ago for my own daughter

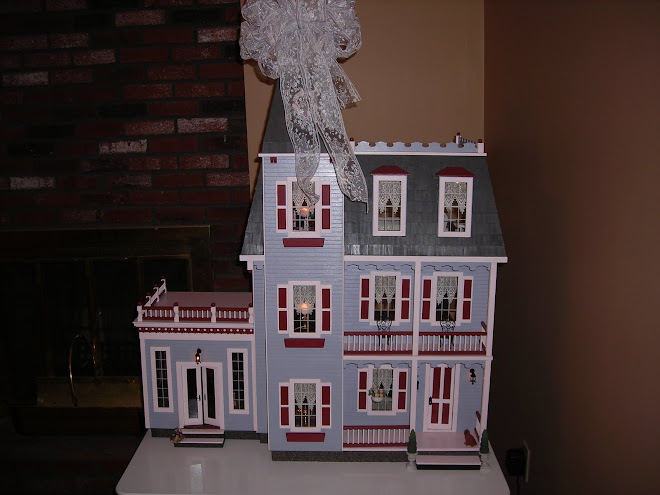
2nd house I started / 3rd to be completed (don't ask)
How I got started building dollhouses
Thursday, June 18, 2009
When folks see some of the houses I've built, many will ask how I got started building them. The very short answer is "it is my wife's fault". My wife has a weekly woman’s group that started out as a 'knitting' group but 'knitting' does not even begin to describe the types of craft and community service projects they have undertaken. It has been said that they could run a small country (and just for the record, I would agree). So when my wife found out that there was a dollhouse kit at one of her friend's house that had been started, (barely started as I later found out) packed up in a few boxes, and not touched for several years due to the lack of someone to build it, my wife told her friend bring it over and we'll have the Tuesday night girls do it. She went on to say I'll have my husband 'electrify' it. Later she told me about it and asked "you CAN put electricity in it right?" To which I replied "Sure, I am an Electrical Engineer... I can put electricity into most anything." It wasn't until the boxes of parts came to my house that I realized that yours truly was about to become the general contractor (and all the sub-contactors as well). Every week, when the women came over for their weekly 'knitting', they couldn't wait to checkout the progress I had made since they saw it last. Given all this encouragement, I continued to plow ahead. Somewhere about half way through construction I realized that you can build a dollhouse kit and have it look like crap or have it look pretty darn good. It is the attention to detail and precision work that determine which way things will turn out. By the time I was making the final finishing touches and getting ready to let this house go to the owner's granddaughter that it had always been intended for, I knew some day I would built another one. I just didn't think it would be so soon! About a month later I was coming back from a business trip in Europe and my wife picked me up at the airport. There was a brand new dollhouse kit in the back of the car. Part inventory started that night and part preparation started the very next day. As I write this, I've completed four dollhouses, have a fifth house in the build process and most of the materials for a sixth house.
When folks see some of the houses I've built, many will ask how I got started building them. The very short answer is "it is my wife's fault". My wife has a weekly woman’s group that started out as a 'knitting' group but 'knitting' does not even begin to describe the types of craft and community service projects they have undertaken. It has been said that they could run a small country (and just for the record, I would agree). So when my wife found out that there was a dollhouse kit at one of her friend's house that had been started, (barely started as I later found out) packed up in a few boxes, and not touched for several years due to the lack of someone to build it, my wife told her friend bring it over and we'll have the Tuesday night girls do it. She went on to say I'll have my husband 'electrify' it. Later she told me about it and asked "you CAN put electricity in it right?" To which I replied "Sure, I am an Electrical Engineer... I can put electricity into most anything." It wasn't until the boxes of parts came to my house that I realized that yours truly was about to become the general contractor (and all the sub-contactors as well). Every week, when the women came over for their weekly 'knitting', they couldn't wait to checkout the progress I had made since they saw it last. Given all this encouragement, I continued to plow ahead. Somewhere about half way through construction I realized that you can build a dollhouse kit and have it look like crap or have it look pretty darn good. It is the attention to detail and precision work that determine which way things will turn out. By the time I was making the final finishing touches and getting ready to let this house go to the owner's granddaughter that it had always been intended for, I knew some day I would built another one. I just didn't think it would be so soon! About a month later I was coming back from a business trip in Europe and my wife picked me up at the airport. There was a brand new dollhouse kit in the back of the car. Part inventory started that night and part preparation started the very next day. As I write this, I've completed four dollhouses, have a fifth house in the build process and most of the materials for a sixth house.
Monday, September 28, 2009
Subscribe to:
Post Comments (Atom)


No comments:
Post a Comment