
Dollhouses with roofing shingles can readily require several hundred to over 1,000 shingles. If the total processing time per shingle (prep, finish, apply, trim to fit, touch up, etc) were to average one minute and you had 1,000 to do, you would need over 16 hours to complete this part of your project. I guess if you are only ever going to build one dollhouse, and that project takes you a couple hundred hours overall, you might not mind spending the equivalent of two eight hour days doing nothing but roof shingles. Given that my second dollhouse project started about 1 month after my first house was done, and I’ve had at least two (sometimes more) in the works ever since, getting the whole roofing shingle process done faster without giving up any quality, was important to me.
If you are taking the time to read this post and have one (or more) roofing jobs in your future, I do hope that you will find sufficient value in this post to make it worth the time to read. Given that a picture has been said to be worth a thousand words, I am making a note to take some photos the next time I shingle a roof so I can revise (and greatly shorten) this post.
Materials:
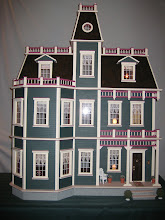
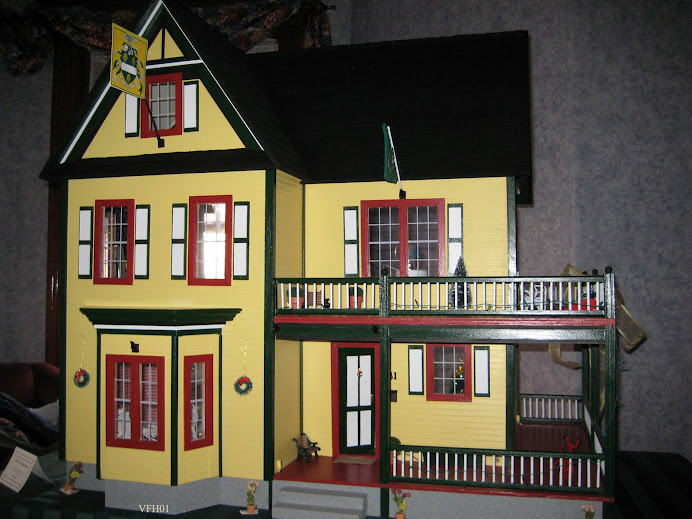
When it comes to dollhouse roofing materials, there are several options to consider. I think the most popular, across all wooden dollhouses (and Victorian style dollhouses in particular), would be wooden shingles. Other options, to name a few, include material that looks like asphalt roofing shingles, materials to make thatched roofs, and simply painting the roof. If you look for it, you can even find copper foil to be used either as flashing / trim or even an entire roof. Searching the web with the right groups of keywords will yield numerous pages on this subject and something I would recommend you do as this blog post is surely not all inclusive. Many wooden dollhouse kits either come with wooden roofing shingles or expect that the builder will purchase them separately. Other kits, typically smaller and less expensive kits where shingles are not provided, may be shown in the manufacturer’s picture of the built house with plain painted roof surfaces. I have one such kit build in process right now and decided that wooden roofing shingles are a must to achieve the desired end result. All houses I’ve built to date have had wooden roofing shingles. Earth and Tree Miniatures, noted in my supplier list, has an Irish Cottage kit that is ideal for trying your hand at thatched roofs. I would like to build one (who knows maybe a few) of these someday.
Stain, Paint, Other Finishes:
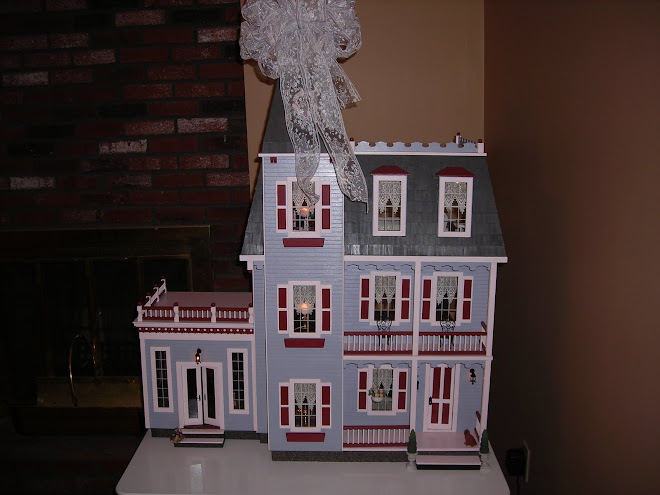
The two most popular options here are stain, followed by paint. Some people leave their roofing shingles plain. Again the web can provide additional details and pictures of what other people have tried along with their builder tips from what they learned in the process. I’ve seen one case where shoe polish was used and another where the shingle treatment was intended to give the shingles a ‘weathered’ look. As an alternative to stains, you should also note that there are dollhouse roofing shingle dye kits available. I’m going to stick with what I have personal hand on experience with which is paints and stains. My personal preference (for most houses) is stained roofing shingles. That said, there are two houses I’ve built with painted roof shingles that are worth mentioning. One had black shingles which after some ‘tweaks’ looked much like a black asphalt shingle roof and the other house was made to look like it had a slate roof.
Need to Sand Shingles?
For stains (and I would think dyes as well) little or no sanding should be required. If a shingle has a sliver of wood hanging off one of the vertical sides, (from the manufacturing process) it should be removed but this should pretty much be a ‘wipe’ operation not a sanding step. If a shingle is too rough on one facing side, it can be used rough side down instead of sanding and if some small number of shingles are too rough on both sides they can be set aside / not used unless your find you need them. Note that dollhouse shingles often come in packages that have quantities of at least 100 shingles. Quantities of 250, 500, or 1,000 are pretty common. If you are going to paint the shingles, the answer to the sanding questions is a ‘maybe’. The shingles are going to have differing degrees of ‘roughness’. If you are going for the asphalt shingle look, this roughness can work in your favor. Additionally, you are going to need to avoid getting much of a ‘shine’ gloss and semi-gloss paints can have when applied to smooth surfaces. If asphalt type roofing shingles is the look you are going for, you may need some light sanding in two cases. The first is when the shingle is just too rough (on both sides and must be used due to lack of having enough extra shingles), and the second is where the shingle is too smooth. While sanding is generally preferred before painting, the fastest way to deal with this is to pre-sand only in the case of shingles being too rough on both sides but still must be used. Like with stains, any slivers of wood along the side of the shingle should be removed. The bottom edge of the shingle if particularly rough can get a quick drag across a flat piece of sandpaper to smooth it just a tad. Sanding because a shingle is too smooth can and should be deferred until the need is made clear (the roof is painted and shingled and you want to dull some shiny areas. This is best done with sand paper (about 100 – 120 grit) with just a couple of forceful downward strokes to put some roughness (scratches) into the exposed shingle surface. Expect to re-paint these areas.
When to Paint / Stain:
It is better, both in terms of time and in terms of quality, to stain / paint before the shingles are applied to the roof. This is because it can take too long to get proper coverage in cracks where shingles meet or overlap. Even with this pre-finish step, you should expect to have to do some touchup after the roof is shingled. Given that the surface the shingles will be applied to is generally not the same color as your shingles, you will want to paint or stain it to the same color as (or perhaps a bit darker than) your shingles. Even with the best of fits in shingle spacing, a lighter under surface will show through in some places and it and can be difficult and/or time consuming to get paint or stain down into these areas after the shingles are glued onto the roof. Finally, you will need to allow enough time for the paint or stain to completely dry before you start gluing the shingles onto the roof. While the dry time for paint might be as little as an hour or so, stains can sometimes take a couple of days (so you need to plan ahead). If you do find yourself pressed for drying time, you could try to force dry stained or painted shingles in an electric oven but this should be done at a fairly low temp (like around 120 – 130 F), use the convection feature if you have it as the air flow helps a lot, and be sure to ‘burn off’ any lingering fumes before cooking anything you plan on eating. WARNING: Oven baking to force dry stained shingles could be problematic. Flammable paints and stains are, well, flammable and force drying in an oven is likely to increase the level of flammable vapors. Using this force dry method in a gas fired oven is probably NOT a good idea. Even with a force dry method such as baking in an electric oven, stain dry times will still be some number of hours (better than days but still not real fast).
One way to get a quality stain job of hundreds of shingles and get it done quickly (with quickly being somewhat of a relative term) is as follows:
You will need:
- Plenty of space to work and lay out 100’s of shingles at a time
- A surface you can place wet stained shingles on and not have them stick too much (I use either cookie trays lined with aluminum foil (shiny side up) or good sized pieces of scrap laminate shelving or counter top.)
- Two containers large enough to hold about 20 – 25 shingles completely submerged in stain
- A funnel with a fairly wide top and a bottom that is too small for shingles to fall through
- A paint brush (about ½ to 1X the width of the shingle)
- Paper towels or rags that can be used as a blotter to absorb excess stain from coated shingles
- I also suggest a latex (or rubber if allergic to latex) glove for at least one hand.
Procedure:
- Pour some stain into one of the containers
- Add about 20 or so shingles and stir (so that shingles get separated enough for a complete coat of stain
- Let it sit long enough to absorb enough of the stain to get the color you want
- Place the funnel in the other container and pour the container (with stain and shingles) into the funnel. The stain will drop through the funnel into the other container while the shingles will be left in the bottom of the funnel
- Take the shingles out of the funnel one at a time (with your gloved hand) and brush excess stain off them into the funnel as you are taking them out
- Blot them if required but if you keep your brush from holding too much stain, this won’t be needed.
- Place the shingle down on whatever you are using as a place for them to dry
- Repeat for each shingle in the funnel then move the funnel to the other container and place more shingles in the container that now has the stain
Once your get the hang of it, you can crank these out by the hundreds ‘relatively’ fast.
If you are using paint instead of stain, you can skip the pouring from container to container and the funnel. Pick up each shingle along what will become will the very top edge. Except for the very top row, this edge will be covered by bottom of the shingle one row up as shingles are glued onto the roof. Give the shingle a quick dip into the paint getting all but the very top covered in paint. At this point, the shingle will have too much paint on it. Remove the excess paint with a few quick strokes of your brush. Remember to keep removing excess paint from your brush as your go. Place the painted shingle down on your drying area. For painted shingles, I always use aluminum foil (shiny side up) on top of my cookie sheet or drying boards and typically do not have any real ‘shingle sticking to the foil’ issues after the paint has dried. (Wax paper might work just as well, but I don’t really know as I’ve never tried it.) To keep up your speed, you need to go through as few motions as possible. For example, pick up the shingle only once and don’t put down until your done with it, when you put it down, place it where you will want it until after it has dried (so you don’t need to move it again), keep the removing of excess paint from the shingle and brush to as few motions as possible. While each of these things will only save small amounts of time per shingle, all these small amounts of time when added up over say 800 to 1,000 shingles will turn into hours of saved time.
So, why paint the back side of painted shingles? Reasons include: It can help prevent warping, gives you the later option to use either side of the shingle as the facing side, and dipping / removing excess paint is faster than applying paint by brush to one facing side, the two side edges and the bottom edge. With the dip method, you should not need a second coat before the shingles are applied to the roof. (again, you can still expect a need for some touch up after the shingles have been glued in place on the roof).
Last but not least, if you think you have a significant higher number of shingles than you need, you can save some time by not staining / painting them all. You should use reliable means of estimating how many shingles you will need, and then pad that number by enough to cover possible under-estimation, shingles that have reduced coverage area because they have to be cut, and a few more for trimmed shingles that split out on you or otherwise don’t fit right and have to be replaced by another shingle. Keeping track of how many shingles you’ve stained / painted is easier if you lay them out in your drying areas in groups of fixed numbers (like 20, 25, or 30). Once you have started putting shingles on your roof, you don’t really want to find out your didn’t stain / paint enough of them to finish the job.
Adhesive of Choice:
This one is a no-brainer. You want to use a non water base quick setting adhesive such as Liquid Nails Construction Adhesive. Buy it in the tube for calking guns and cut the end of the tube at a near 45 degree angle near the very end so that you end up with a fairly small bead as you apply it along your roofing guidelines. Rather than describe all of the reasons why you don’t want to use tacky glue, hot glue, yellow woodworking glue, etc., I am going to just say trust me on this issue.
Roofing Layout Lines for Shingling:
For one inch scale dollhouses, the straight cut shingles tend to be about 1.25 inches in height and meant to be applied with a 0.25 inch overlap (which leaves 1 inch of exposed shingle face per row). Other, non-straight cut shingles might require different overlap spacing so as not to leave any exposure of the sub-roofing. I have found that it is much easier to put the layout lines on the roof panels while they are still separate pieces lying flat on my work bench. If you have roof surfaces that slope at different angles, you will find that the difference in slope / angles will result in some vertical skew of top/bottom shingle edges as you work you way up the roof with rows of shingles. The skew per row is cumulative over the slop of the roof panel. As you layout your roofing lines, you will want to keep this in mind and think about what the shingled roof will look like once the shingles are on in. If the skew per row is very small, you might elect to compensate for it with a slight increase in overlap on the roof panels that achieve greater vertical coverage per row of shingles. One other factor to bear in mind is that often times, the top row of shingles will need to be cut shorter in height to fit properly. To avoid having this look a bit odd, you will want to not have the top row of shingles not be too tall or too short. This might require a slight tweak of overlap in all or some of the rows of shingles that lead up to this point. Roofing layout / guidelines need to be visible when the shingles age being glued on. Most of the time, these lines can still be seen if the roof panel is stained after the lines have been draw. If the roofing panel is to be painted, then you should decide if you want to paint first and then apply the guidelines or lay down the guidelines and then paint being careful not to paint over the lines. (Painting first is often much faster as you can hit the whole panel either with a small roller or a fairly wide brush.).
Cutting Shingles to Fit:
Roofing shingles are generally not applied until after the roof panels have been assembled and are part of the house. Assuming this in the case, it becomes obvious that for inside corners, the shingles have to be cut and fitted before they can be glued in place. When dealing with inside corners, it is much easier to start the row of shingles with the inside corner cut shingle and work your way out the row to what most of the time is an outside corner or edge. This keeps you from having to get both the shingle width and the inside corner angle cuts correct on the same shingle. In this way, the width only needs to be such that the vertical joint be offset from the row below. My leading thoughts on how to get the angles right are: 1) Make a template by tracing the under lying roof panel onto a piece of paper before the panel becomes part of the house. 2) Make a template after the roof panel is part of the house. This can be done by holding a piece of paper along the bottom edge of the roof panel and then folding it into the inside corner. The crease in the paper should give you the correct angle. 3) Eyeball it, make the angle cut, check for fit and ‘tweak’ the angle with another cut if needed. When cutting shingles, I typically place the shingle on a scrap piece of wood and then place a sharp wide putty knife over where I want the cut. For cuts along the grain, pushing the putty knife down firmly will often cut the shingle. For cross grain or angle cuts, I apply pressure to the putty knife to hold the shingle firmly in place and then use the edge of the putty knife as a guide for cutting the shingle with a razor sharp utility knife. Making a nice clean cut can require that you not try to cut through the shingle with a single pass of the knife but rather make few passes to complete the cut. (A nice clean cut shingle is undamaged and requires no sanding.).
For outside corners and edges, I have found that attaching the shingle with some vertical overhang, and saving the trimming until after the glue had completely dried can yield a faster and higher quality result. When doing this sort of trimming there are a couple of things to keep in mind. The first is you want to use a razor shape utility knife or trimming blade. Second, you want to trim shingles in the direction of least removed material to most removed material from the shingle. Generally this will be from the bottom up. This is because if (really when) a shingle splits on you it will almost always follow the grain of the wood and thus split along a path that you plan on removing anyway. Cutting in the other direction can lead to having to remove and replace shingles; which can be done but not always fun. If you have to cut in the other direction, (like the very bottom of the bottom row) take it slow and easy to avoid shingle split. You don’t have to cut through the whole shingle in one pass of the blade. Shaving smaller slivers off until you get the cut to where you want it be can also be effective in avoiding problematic split out. Where two roof lines join, you can hold your blade at a bit of an angle and take a fairly close cut all the way along the edge. Now with most of the unwanted overhang removed you can go back and take a closer shave resulting with all of the shingles on that side having ends that are flush with the edge of the joining roofing panel. If you are working on an outside corner where two roofing panels meet, complete one side first (shingle and trim) then do the adjacent panel. When you fine trim the overlap where the two roof lines meet, you can shave the shingles using the shingles on the adjacent roof line as a guide. What you should end up with is one roof panel has shingles flush with the adjacent roof panel and the joining roof panel has shingles that overlay the edge of the shingles on the joining panel (and are cut flush to the front side of those shingles).
Applying the Glue and Shingles:
With the exception of partial (cut to fit) shingles, all that is required is a thin bead of glue right below the guide line for the top of each row of shingles. In general, you should be able to apply the bead of glue for an entire row then attach each shingle. Firmly press the shingle into place and hold it there (so it does not move) as you place the next shingle next to it. By doing a single row of shingles on one roofing surface and then one row on one or more other roofing surfaces, you should be able to go back to the first roofing surface and apply the next row of shingles without having to wait for the glue to set up more. If for some reason you can’t work this way, you should wait until the glue is set up enough such that the last row of shingles applied will not move on you while you are applying the next row.


No comments:
Post a Comment